Fashion Design Elements and Principles
To learn fashion design first thing to learn would be design elements and principles.
This guide explains each element step by step . By the end, a young designer should be able to draw a clear fashion design and explain it properly, just like in a design class.

What you need before you start
Keep the tools simple. Fancy materials are not needed.
You can use:
A drawing book or plain paper
Pencil and eraser
Black pen or sketch pen
Crayons, colour pencils, or watercolours
Ruler
Small fabric pieces, ribbons, or textured paper if available
A simple human body outline, also called a fashion figure
A fashion figure does not need to be perfect. It is only a guide to show where the clothes sit on the body.
A good fashion sketch should show the idea clearly, not perfectly.
1. Draw lines to show direction and mood
A line is a mark that moves from one point to another. In fashion, lines help show shape, style, and movement.
Lines can be:
Straight
Curved
Zigzag
Wavy
Thick
Thin
Vertical
Horizontal
Diagonal
To draw lines for fashion, start with a simple dress outline. Add different lines and see how the dress changes.
Vertical lines go up and down. They can make a dress look tall and slim.
Horizontal lines go side to side. They can make a garment look wider or more relaxed.
Diagonal lines look active and exciting. They are useful for party wear, sporty jackets, or stylish tops.
Curved lines look soft and graceful. They work well for gowns, dupattas, lehengas, and flowing skirts.
Try this:
Draw three T-shirts.
On the first, draw vertical stripes.
On the second, draw horizontal stripes.
On the third, draw diagonal stripes.
Now compare them. The same T-shirt will look different because the lines changed.
2. Draw shapes to build the garment
A shape is a flat area with an outline. It has height and width, but it does not look deep.
Common shapes are circles, squares, rectangles, triangles, and ovals. Fashion designers use these shapes every day.
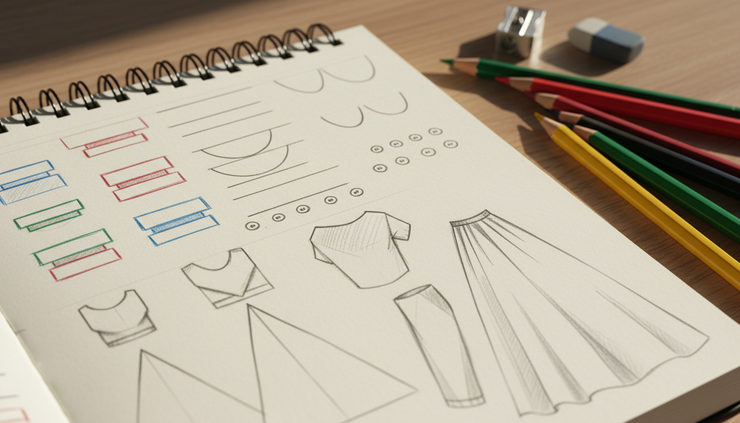
A sleeve can be a rectangle. A skirt can be a triangle. A pocket can be a square. A neckline can be a circle or oval.
To draw shapes in fashion:
Draw a simple body outline.
Add a rectangle for a top.
Add a triangle for a skirt.
Add small squares for pockets.
Add circles for buttons.
Now you have a basic outfit made from shapes.
Young students often worry that they cannot draw fashion. But most clothes begin with simple shapes. A lehenga skirt may start as a wide triangle. A kurta may start as a long rectangle. A puffy sleeve may start as an oval.
3. Draw form to make clothing look 3D
A form is like a shape that looks solid. Shape is flat. Form looks like it has depth.
For example:
A circle is a shape.
A ball is a form.
A rectangle is a shape.
A box is a form.
In fashion drawing, form helps clothes look like they are sitting on a real body.
To draw form, use curved lines. Clothes wrap around arms, shoulders, waist, and knees. So the lines should also bend.
Try this for a sleeve:
Draw an arm as a long tube.
Draw two curved lines around the arm.
Add a cuff at the wrist.
Shade one side lightly.
Now the sleeve looks round, not flat.
For a skirt, draw folds that curve outward. The centre fold can be straight, but side folds should bend a little. This makes the skirt look full.
4. Use space so the design can breathe
Space means the empty area around and inside a design. It helps the eye rest.
In fashion, space can be plain fabric, empty background, or gaps between patterns.
If every part of a dress has flowers, stripes, buttons, lace, and colour, the design may look too crowded. Space makes it neat.
There are two kinds of space:
Positive space is the part filled by the design, like the jacket, skirt, or embroidery.
Negative space is the empty area around or between the design.
To practise space:
Draw a plain kurta.
Add embroidery only near the neckline.
Leave the sleeves and lower part plain.
Look at how the empty area makes the neckline stand out.
Space is not “nothing”. It is part of the design.
5. Choose colour to show feeling
Colour is one of the most exciting design elements. It can make a garment look happy, calm, bold, royal, simple, or festive.
Warm colours include red, orange, and yellow. They feel bright and energetic.
Cool colours include blue, green, and violet. They feel calm and peaceful.
Neutral colours include white, black, grey, beige, and brown. They help balance strong colours.
To use colour in a fashion sketch:
Pick one main colour.
Pick one supporting colour.
Add one small accent colour.
For example, draw a blue dress with white sleeves and tiny yellow buttons. The blue is the main colour. White supports it. Yellow adds a small sparkle.
Do not use too many bright colours at once. A good designer chooses colours with care.
A useful school exercise is to colour the same dress in three ways:
Red and gold for a festive look
Blue and white for a calm look
Black and silver for an evening look
This is a simple way to understand Fashion Design Elements Explained for Kids How to Draw Lines Shapes Color and More in a practical sketching activity.
6. Show balance so the outfit feels steady
Balance means the design feels even and stable. It does not feel like one side is too heavy.
There are two common types of balance.
Symmetrical balance means both sides look the same or almost the same. A school uniform shirt is often symmetrical. Both sleeves match. Both sides of the collar match.
Asymmetrical balance means both sides are different, but still look good together. For example, one shoulder may have a big bow, while the other side has a plain sleeve. The bow is balanced by colour, shape, or space somewhere else.
To draw balance:
Draw a dress with equal sleeves, pockets, and buttons.
Then draw another dress with one large design on one side.
Add a small matching design on the opposite lower side.
Check if the outfit still feels steady.
Balance helps the viewer feel comfortable when looking at the design.
7. Create unity so everything belongs together
Unity means all parts of the design look connected. Nothing feels strange or out of place.
A designer creates unity by repeating colours, shapes, lines, or patterns.
For example, if a frock has round buttons, round flower prints, and a round neckline, the design feels united because the round shapes repeat.
To draw unity:
Choose one main shape, such as a circle.
Use it for buttons.
Use it in the print.
Use a soft round neckline.
Keep the colours related.
Unity does not mean everything must be exactly the same. It means the design parts should look like they are friends.
8. Add variety to keep the design interesting
Variety means adding differences so the design does not look boring.
If unity is about things matching, variety is about small surprises.
You can create variety by changing:
Line thickness
Shape size
Colour brightness
Pattern scale
Texture
Sleeve shape
Hem length
For example, draw a plain white top with a colourful printed skirt. The plain top gives rest. The printed skirt gives variety.
Be careful. Too much variety can look messy. A good fashion design has both unity and variety.
Try this:
Draw a simple jacket.
Keep the colour the same.
Add different pocket shapes.
Add one striped sleeve lining.
Keep the rest neat.
Now the design has interest without becoming confusing.

9. Use emphasis to show the most important part
Emphasis means the part of the design that catches the eye first.
A designer may want people to notice:
A big collar
A bright belt
A special sleeve
Embroidery on the neckline
A large bow
A shiny border
To draw emphasis, choose only one main focus. If everything is special, nothing feels special.
Try this:
Draw a simple dress.
Keep most of it light pink.
Add a bright purple belt.
Add only small matching purple buttons.
The eye will go to the belt first. That is emphasis.
In Indian clothing, emphasis is often seen in borders, dupattas, necklines, and embroidery. A plain kurta with a detailed neckline can look beautiful because the attention goes to one clear place.
10. Draw movement so the outfit feels alive
Movement means the design leads the viewer’s eye from one part to another. It can also show that fabric is flowing.
In fashion, movement appears in:
Draped fabric
Flowing dupattas
Curved seams
Repeated pleats
Wavy hems
Diagonal lines
Cascading ruffles
To draw movement:
Draw a skirt.
Add long curved lines from the waist to the hem.
Make the lines spread out at the bottom.
Add a few wavy lines near the hem.
Shade one side of each fold.
Now the skirt looks like it can move while walking.
For a dupatta, draw one end near the shoulder and let the fabric curve down. Use soft wavy lines. Add small folds where it bends.
11. Make pattern by repeating a design
A pattern is made when a line, shape, colour, or motif repeats.
Common fashion patterns include stripes, checks, dots, flowers, leaves, waves, and geometric designs.
To draw a pattern neatly:
Choose one small motif, such as a leaf.
Draw it lightly in rows.
Keep equal space between each leaf.
Repeat the same size.
Colour all leaves the same way.
For a child, dots are the easiest pattern to start with. Use pencil marks first, then colour them. Checks are also good practice because they teach neat spacing.
A pattern can be all over the garment or only in one area, like a border.
12. Use proportion so parts look the right size
Proportion means the size of one part compared with another part.
If a pocket is bigger than the shirt, the design will look funny unless that is the idea. If sleeves are too tiny, the garment may look uncomfortable.
To understand proportion:
Draw a shirt.
Add normal-size buttons.
Draw the same shirt again.
Add huge buttons.
Compare both sketches.
The second shirt may look playful, but the first one may look more wearable.
In fashion, proportion helps decide sleeve length, collar size, skirt width, pocket placement, and border thickness.
For a 10-year-old student, a simple rule is helpful:
Small garment parts need small details. Large garment parts can carry larger details.
13. Show texture so fabric can be imagined
Texture means how something feels or looks like it feels.
Fabric can look:
Smooth
Rough
Shiny
Soft
Fluffy
Thick
Thin
Crinkled
Woven
A silk saree may look smooth and shiny. Denim may look rough and thick. Cotton may look soft and light. Wool may look warm and fuzzy.
To draw texture:
For shiny fabric, leave white highlights and shade smoothly.
For denim, use tiny short lines and dots.
For wool, use small soft curved strokes.
For net fabric, draw light criss-cross lines.
For sequins, draw tiny circles or sparkles.
Texture makes a drawing feel real. Even without touching the fabric, the viewer can imagine it.
14. Use value to show light and dark
Value means how light or dark a colour is. Light blue and dark blue are different values of blue.
Value helps show folds, shadows, and form.
To practise value:
Draw a rectangle.
Divide it into five boxes.
Leave the first box white.
Make each next box darker.
The last box should be the darkest.
This is called a value scale.
Now use value on clothing. If light comes from the left side, keep the left side of the dress lighter. Shade the right side gently. Add darker shading inside folds.
Value makes fashion drawings look more finished and clear.

15. Combine the elements in one fashion design
Now it is time to use everything together. This is how a fashion tutor may guide a student through one complete design.
Step 1. Pick a garment idea
Choose one simple outfit, such as:
A party dress
A kurta and leggings
A hoodie
A lehenga
A skirt and top
A jacket
Let us choose a simple festive kurta.
Step 2. Draw the basic outline
Draw a light body outline. Add a long rectangle shape for the kurta. Add sleeves. Draw the neckline.
Keep the pencil lines light so mistakes can be erased.
Step 3. Add lines and shapes
Use vertical lines on the kurta to make it look longer. Add small circle buttons. Add a curved neckline.
Step 4. Plan space and emphasis
Keep most of the kurta plain. Add embroidery only near the neckline. This creates emphasis and keeps enough space.
Step 5. Choose colour
Pick teal as the main colour. Use cream for the trousers. Add gold as a small accent on buttons and embroidery.
Step 6. Add pattern and texture
Draw a small leaf pattern on the border. Add tiny dots to show embroidery texture. Use smooth colouring for the fabric.
Step 7. Show movement and value
Add light folds from the shoulder and waist. Shade one side of the kurta darker. Keep the other side lighter.
Step 8. Check balance, unity, variety, and proportion
Ask these questions:
Does the design feel balanced?
Do the colours look connected?
Is there enough variety?
Are the buttons, sleeves, and border the right size?
Can someone understand the fabric and style?
If the answer is yes, the design is ready to present.
How to show the design properly
A fashion design should be shown neatly so others can understand it.
Write a small label under the drawing with:
Garment name
Main colours
Fabric idea
Special design feature
Patterns or textures used
Example:
Festive kurta design
Main colours are teal, cream, and gold. The kurta has vertical lines, a curved neckline, leaf border, and gold embroidery. The fabric is smooth cotton silk. The main emphasis is on the neckline.
This short explanation shows that the student understands the design, not just the drawing.

A simple practice challenge
Choose any one outfit and make a mini design board.
Use at least eight design elements:
Lines
Shapes
Colour
Space
Balance
Emphasis
Pattern
Texture
Then explain the design in five sentences.
A young designer succeeds when the sketch is clear, the colours are planned, the main focus is easy to see, and the design can be explained in simple words. Start with easy shapes, practise often, and every new sketch will look more confident.

Comments